Installing Actis Hybris Panel
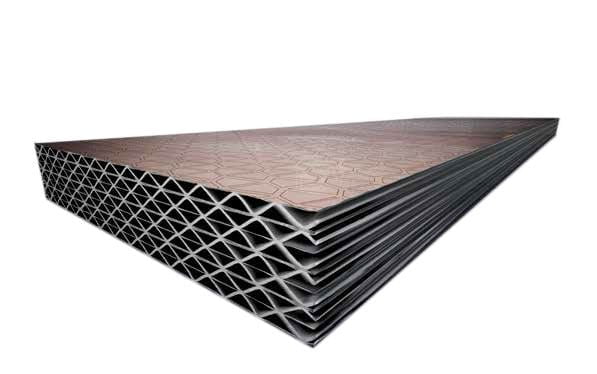
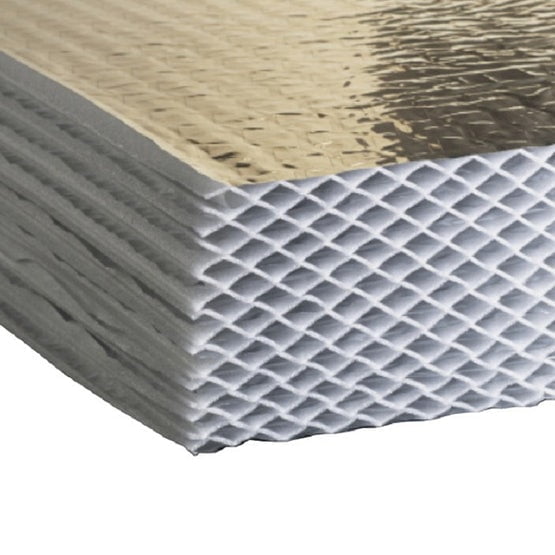
Actis Hybris insulation panels are an insulation material that consists of shaped polyethene foam glued to aluminium coated polyethylene foils. On one side of the insulation is a copper-coloured vapour control layer of Hybris that resists wind and moisture.
The foil facing is used to reflect heat back into the building to prevent heat escaping. Therefore, when heat rises reaches the properties thermal envelope the foil will reflect the heat back, heating the building again from the top down or the outside inward.
Hybris panels can be installed within roofs, walls, floors, and ceilings. The boards are 1145cm by 1200mm and come in a range of thicknesses between 50mm and 205mm with a high thermal conductivity of 0.033 w/mk
Before installing Actis Hybris Panel, there are some things you will need to consider:
Electric Wiring:
A hole can be created through the panel using a sharp tool such as a screwdriver or sharp knife. Pass the wire through the panels prior to friction fitting within the opening. Cut two pieces of foil tape 10mm long. Stick the tape either side of the protruding wire and attach the wire to the product. Fixtures and fittings should not affect the insulation, joints need to be sealed airtight using foil tape.
Pipes and Ducting:
Make a cross shaped cut in the copper-coloured face that matches the diameter and placement of the pipe using a sharp blade. Put the pipe through the Hybris panel when installing the panel within the opening. Cut multiple pieces of foil tape and place them around the pipe overlapping each piece by 1cm.
Thermal Bridging:
To avoid thermal bridging a continuity of insulation and airtightness is required throughout the building envelope. Thermal bridging occurs where there are breaks in between insulation materials or punctures within the insulation layers. Thermal bridging can reduce thermal performance, and possibly contribute to condensation forming and a reduction in energy efficiency.
To reduce thermal bridging ensure:
- Insulation layers are tightly fitted without gaps
- Joints are sealed between adjacent insulation layers
- continuous insulation and airtightness at construction junctions
Prior to Installation of Actis Hybris Panel
The points below highlight considerations you need to take before installing Actis Hybris Panel.
- Hybris need to be installed with the copper-coloured film facing toward the inside (warm side) or the building
- Keep penetration of Actis Hybris panels to a minimum
- Hybris does not release irritable materials when cutting
- Actis Hybris Panel is flexible and accurately fits into all widths
- The panels can be ‘friction fit’ between rafters and studs
- Ensure the panels are cut 5-10mm wider than the vertical opening
- Ensure the panels are cut 20mm higher than the horizontal opening
- Actis Hybris can be combined with other insulation materials such as insulated plasterboard or foam boards.
- A continuous vapour barrier is recommended when installing Actis Hybris Panel
- Always keep the Actis Hybris Panel away from fire or any source of ignition
- Hybris is non-load bearing and therefore it should not be walked on
How to Cut Actis Hybris Insulation Panels
When insulating your property, Actis Hybris Panel are a reliable and popular choice due to their ease of installation and thermal properties. In order to install your insulation materials with the upmost efficiency and precision, an accurate cutting technique is essential. Here we will explore how to cut Actis Hybris Panels, what you need, and the safety precautions.
What You Need:
- Permanent Marker Pen
- Insulation Saw or Electric Alligator Saw
- Tape Measure
Safety Measures
Always ensure that the panels are firmly supported and stable when cutting. This will prevent unexpected movement that could result in injury or faults to the cutting, markings and measurements.
When cutting panels always use a sharp blade to avoid injuries caused due to needing more force and pressure to cut. Sharp blades achieve cleaner and more precise cuts. Cutting may need to be carried out throughout the install, ensure your saw has a designated place when not in use to prevent accidents.
Discover the full range
Step 1: Measuring and Marking
Prior to unpackaging or cutting your panels, very carefully measure and mark the required dimensions of the panels using a tape measure and a permanent marker pen. Always double check your markings to avoid waste and guarantee accuracy. A handy tip to follow is to measure the space twice and cut the panels once.
Step 2: Cutting to Size
Start by ensuring the panels are tapped down in their original packaging on a solid reliable surface. Cut the Hybris approximately 5-10mm wider than the gap measured between the timbers. Be sure to keep the Hybris material inside the packaging whilst cutting. Using a saw, cut through the entire pack of the panels following the markings.
Step 3: Accurate Fit
Once the panels have been cut, remove, and recycle the packaging using a sharp knife, careful not to damage the product. Prior to installing, hold both ends of the copper-coloured face and pull the product open to its full length. Turn the panel over and do the same to the silver-coloured face.
Trimming: (if required)
If the Hybris panels need to be trimmed length ways, the direction of the integral structure of the panels makes it easy to accurately cut. Ensure you have followed steps 1, 2, and 3 prior to trimming the length. The panels need to be approximately 20mm longer than the opening.
How to Install Actis Hybris Panels into a Timber Frame Wall
When applying Actis panels, ensure the thickness of the insulation is in conjunction with the depth of the opening between the timber studs.
What You Need
- Actis Hybris Panel
- Permanent Marker Pen
- Insulation Saw or Electric Alligator Saw
- Tape Measure
- Foil Tape
- Stapler and Staples
Step 1: Prepare the Insulation
Measure the spaces within the timber frame wall and measure and cut the panels to size. Be sure to measure each section of the timber frame prior to cutting in case the spaces differ in size from each other. Make sure the space is clean, dry and protrusion free. Ensure you cut the panels slightly wider than the frame for a good friction fit hold and check the cut is accurate.
Step 2: Friction Fit the Panels
When the panel has been cut to size and an accurate fit has been confirmed, push the Hybris panels into the opening between the timer studs and up against the back surface of the wall. Tuck the panels into the timber careful not to compress the insulation.
Then, friction fit the next panel in the same way and ensure there is a good fit between the two joining pieces of insulation and between the insulation and the timber.
Step 3: Secure the Insulation
For extra support, staple the panel (through the copper-coloured film and one layer of foam) to the horizontal timber frames – the top and the bottom of the frame. Use foil tape and apply where the two panels connect to secure the mid-section of the insulation within the frame and to avoid thermal bridging. Repeat between all studs.
How to Install Actis Hybris Panels into Pitched Roof
When installing Actis Hybris insulation panel within a pitched roof, a thicker material may be required to meet the depth of the openings between the rafters. Measure the depth to get an indication of the insulation panel thickness that you require.
What You Need
- Actis Hybris Panel
- Permanent Marker Pen
- Insulation Saw or Electric Alligator Saw
- Tape Measure
- Foil Tape
- Stapler and Staples
Step 1: Prepare the Insulation
Measure the spaces within the rafters in the roof and measure and cut the panels to size. Be sure to measure each section between the rafters prior to cutting in case the spaces differ, particularly in older buildings.
Make sure the space is clean, dry and protrusion free. Ensure you cut the panels slightly wider than the pace for a good friction fit hold and check the cut is accurate.
Step 2: Friction Fit the Panel
When the panels have been cut to size and an accurate fit has been confirmed, push the Hybris panels into the opening between the timer rafters and up against the back surface of the pitched roof. Tuck the panels into the rafters whilst ensuring the panels are not too compressed. Then, friction fit the next panel in the same way and ensure there is a good fit between the two joining pieces of insulation and between the insulation and the timber.
Step 3: Secure the Insulation
For extra support, staple the panels (through the copper-coloured film and one foam layer) to the horizontal timber rafters– ridge beam and wall plate. Use foil tape and apply where the two panels connect. Repeat between all rafters.


